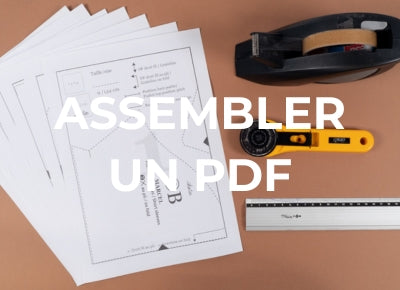
Sewing pattern projection: how does it work?
What is pattern projection?
Already very popular in the United States, pattern projection is gradually becoming more widespread in France. In concrete terms, this involves projecting the pattern directly onto your fabric , allowing you to immediately start cutting. No need to print or trace your patterns: the pieces to be cut are projected directly onto the fabric! Put like that, it's a bit revolutionary, right?!

What are the benefits of pattern projection?
Pattern projection has many advantages, here are the main ones:
- Time saving: Pattern projection saves time by eliminating the tedious steps of printing, cutting, and assembling pattern sheets, as well as tracing. This technique allows you to move directly to cutting, which significantly speeds up the process and allows you to focus on other aspects of the design.
- Increased accuracy: Projected patterns provide greater accuracy by eliminating potential errors associated with manual tracing: lines are clean and dimensions are exact.
- Resource saving: Projection reduces paper and ink consumption, a benefit that is both economical and ecological! Your patterns are now infinitely reusable, without any wear and tear.
- Simplified storage: Thanks to digital storage, patterns take up less space, are easier to organize, and are easier to find. Say goodbye to endless piles of printed patterns!
What are the disadvantages of pattern projection?
- The initial investment: Purchasing a projector and its stand represents a considerably higher initial cost than purchasing paper and ink. While this investment pays for itself over the long term, it may not seem worth it the first time you use it.
- Calibration: While calibration isn't overly complex, it does require some attention to detail and can be a bit time-consuming, especially at first. Improper calibration can lead to sizing errors that will impact the final result.
- Technology dependency: Pattern projection requires a stable power supply and a suitable workspace. Any technological failure, such as a connection problem, a projector failure, or a dead computer, can interrupt the workflow.
Overall, pattern projection is a valuable long-term technique, especially for frequent use.
What equipment is needed for pattern projection?
This technique obviously requires a bit of equipment, starting with a video projector properly installed on the ceiling or a wall. We recommend you do your research on the subject, as it's ultimately not that expensive. Here's a list of supplies that we think are important:
The essentials:
- A video projector and its stand
- A projectable pattern
- A computer or tablet to read the projectable files
- A software for reading projectable files
- A suitable, flat and stable surface (ideally A0 size)
The appreciated:
- A large cutting mat
- A rotary cutter
- Chalk
- Weights to hold the fabric in place
These are not essential but can make your job much easier depending on your preferences and the size of the pieces to be worked on.
What does an Ikatee projectable pattern file contain?
At Ikatee, the projectable file is included in the PDF version of the pattern, if specified. Here are the technical specifications of our projectable PDF file:
- One layer per size
- A 5 cm and 2 inch calibration grid
- Four colored backgrounds (magenta, cyan, green, yellow)
- The straight wires oriented in the same direction
- All parts are drawn
- Solid lines
- A large free space all around the file (minimum 50 cm)
- The mirrored unfolded pieces
- The pieces aligned with each other to facilitate pattern connections
- Pieces close to each other (to avoid excessive fabric consumption and make it easier to move the file)
- Parts in transparency or on a white background (2 options)
A projectable file contains layers that you can choose to display or not.

What are the steps of pattern projection?
Pattern projection is done in four steps:
- Prepare your materials: Before you begin, make sure you have everything you need within reach to avoid constant back-and-forth. Also, plan for a work surface large enough and clear enough for efficient cutting.
-
Install and calibrate your projector: A poorly calibrated projector won't give you the results you want. Be sure to follow the instructions carefully to ensure a sharp, correctly sized image.
- The installation
To begin, mount your projector on a ceiling, a wall, or a stable stand. How you install it will depend on your workspace and the projector model you choose. To avoid any problems, refer to the instructions that came with your projector when you purchased it. Make sure it's properly aligned with your work surface and check the distance between your projector and the projection surface.
- Calibration

To calibrate your image, turn on the projector and connect it to your computer or tablet. Then, open the projectable PDF file containing the calibration grid. From there, simply adjust the size and position of the projected image to exactly match the grid dimensions (5 cm or 2 inches), while ensuring that your image is straight and the lines are not distorted.
-
Load and adjust your PDF file: Open the projectable PDF file with your reading software (Adobe Reader, Foxit, etc.) and select the layers corresponding to the desired size. Our files have layers that you can choose to display, or not, in order to directly project the measurements you are interested in. Then use the included calibration grid to verify that the projected dimensions are correct. If necessary, adjust the settings on your video projector or reading software to fine-tune the display.

- Plan and cut your fabric: Place your fabric unfolded and flat, taking care to avoid creases. Use weights to hold your fabric in place if necessary. You can choose to cut your fabric directly along the projected lines or trace the outlines of the projected pieces onto the fabric with chalk beforehand, it all depends on your preference and comfort level.
For faster and more efficient cutting, we recommend using a rotary cutter. You can also use sewing scissors, depending on your preference.
How to choose the right video projector for pattern projection?
Before choosing a projector, consider the space you have available to work in. It's also important to consider certain technical aspects, including:
- Projector brightness: This is measured in lumens, a value used to calculate the amount of light emitted by a projector. Depending on the projector's light source, its brightness can be higher or lower. There are three light sources: lamps, lasers, and LEDs. A lamp projector offers 2000 lumens or more, an LED projector produces no more than 2000 lumens, while a laser projector produces around 3500 lumens maximum. For use in a well-lit room, it's advisable to choose a projector with a brightness of at least 2000 lumens. If your room is dark, a projector with 1000 to 1500 lumens may be sufficient, but avoid going below 1000 lumens. For projecting patterns, lamp or LED projectors are perfect!
- Projection distance: The focal length of your projector defines the space required between your cutting surface and your projector lens. The projection capacity of a projector depends on its focal length, there are four types: long throw (often used for film projection), classic throw, short throw and ultra-short throw. Short and ultra-short throw projections are those that allow you to project large images with the minimum distance. For a clear and distortion-free image, a minimum distance of 1.65m is considered necessary between the cutting surface and the projector lens. A classic focal length requires a distance of 1 to 10m, a short throw can be placed less than 1m and an ultra-short throw 30cm.
- Resolution: An image is made up of pixels, and native resolution is the fixed number of pixels a projector can display. The higher the resolution, the better the image quality. There are three resolutions of interest for pattern projection: HD (1280 x 800 pixels), Full HD (1920 x 1080 pixels), and UHD (sometimes called 4K), which corresponds to 3840 x 2160 pixels. We recommend a Full HD image definition, which corresponds to the 16:9 format, or 1920 x 1080 pixels.
- Installation and portability: An ultra-short throw projector doesn't need to be wall-mounted, so you can store it between uses (be careful, it will need to be recalibrated before each use). Conversely, a wall-mounted projector doesn't need to be calibrated with each use, but you'll find it difficult to move.
- Compatibility and connection: It is important to check that your projector is compatible with your computer or tablet via USB, HDMI ports or wirelessly via Wi-Fi or Bluetooth.
- Projected screen size: Make sure your projector can display an image large enough for projecting patterns. For optimal cutting, the work surface should measure the equivalent of an A0 pattern, or 84.1 cm by 118.9 cm.
- Noise: Although often overlooked when purchasing a projector, it can have a significant impact on your long-term comfort. Constant and/or loud noise from the projector can cause discomfort during extended use.
To help you choose, it is always interesting to consult opinions and recommendations on specialized forums to guide your thinking.
What software is recommended for reading projectable pattern files?
To read the file, you need specific software that can read the file but also display the layers, we recommend Acrobat Reader (or otherwise Foxit).
How to maintain and store digital patterns?
We recommend saving your files to secure media (USB drives, online storage services, or external hard drives) and organizing them into folders for easy future access. Because, let's not forget, projectable bosses are tireless!
What are your tips for getting started in pattern projection?
Pattern projection isn't a particularly complicated technique, but it does require some practice and adaptation time. Here are some tips to help you get started with pattern projection:
- Start small: At first, opt for simple patterns (like the Marcel T-shirt, the Helsinki dress, or the Singapore pants) to familiarize yourself with the technique. Choose patterns with few or large pieces to avoid feeling overwhelmed.
- Test: Before you start a full project, test the fabric projection on a scrap piece of fabric or a corner to make sure everything is calibrated and aligned before touching your final fabric.
-
Take advantage of colored backgrounds: Our patterns are designed with colored layers for easy visualization (magenta, yellow, green, and blue). Choose a background that contrasts with your fabric to better see the outlines of the pieces.


- Trace before cutting: Tracing the outlines of the projected pieces onto your fabric with chalk will allow you to check the dimensions and alignment of your pieces before cutting. This is not a mandatory step, but it can be helpful at first.
- Stabilize your equipment: Make sure your projector, computer, or tablet and work surface are stable and won't move during projection. Any instability can affect the accuracy of the projection.
- Use a rotary cutter: For cleaner, more precise cuts, we recommend using a rotary cutter on a cutting mat. This will allow you to follow the projected lines more accurately and with greater ease than using traditional sewing scissors.
- Take your time: Rushing can lead to mistakes! Take the time to properly adjust your equipment and check your measurements before cutting. For long and complex projects, don't hesitate to take breaks.
- Do your research: Check out online guides and videos from individuals who are already adept at the technique. This will give you a clear idea of the steps to follow and, above all, help you avoid certain pitfalls!
- Join community groups: There are many groups on social media (e.g., Facebook) dedicated to sharing advice and recommendations. These groups are often frequented by active, experienced, and friendly users, always ready to help newcomers. They represent a real wealth of information and should not be overlooked!
By following these tips, you should feel more confident about getting started with pattern projection! And don't forget, our team is here to answer any questions you may have.
I still have questions!
For more information on projecting patterns, we recommend visiting the dedicated Facebook group , where you'll find an active community and plenty of tips, including advice on choosing a projector. We highly recommend starting by reading the group's comprehensive guides. All our PDF patterns now have a projectable version.
If the Facebook group isn't enough for you, you can contact us directly by email at contact@ikatee.fr, where our team will be happy to answer all your questions! We're interested in your comments, feedback, and ideas!
Feedback, an idea, a question?
You can contact us at the following address: contact@ikatee.fr.
Customer service is open Monday to Friday , 8am to 4pm , to answer all your questions. You will receive a response from us within 48 hours , excluding weekends and public holidays.