
Tutorial - How to make a patch
Let your creativity flow and make appliqué patches with fabric scraps
Appliqués are primarily decorative.
To make them, follow these steps:
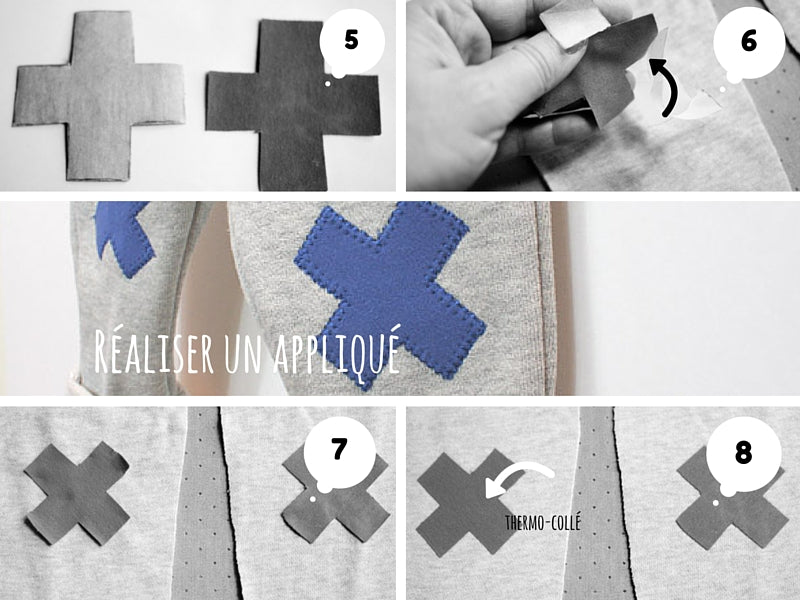
- For thin fabrics, place a rectangle of fabric wrong side down on double-sided fusible paper (check the manufacturer’s instructions) on the pre-glued side.
- Iron without steam to glue the back of the fabric.
- View of the right side of the glued fabric.
- On the back (paper side), draw the outline of the patches.
- Cut the patches carefully.
- Carefully remove the protective film from the paper on the back to be able to glue the patches onto the garment they are intended for.
- Position the patches according to the markings.
- Iron the patches that will be glued onto the legs.
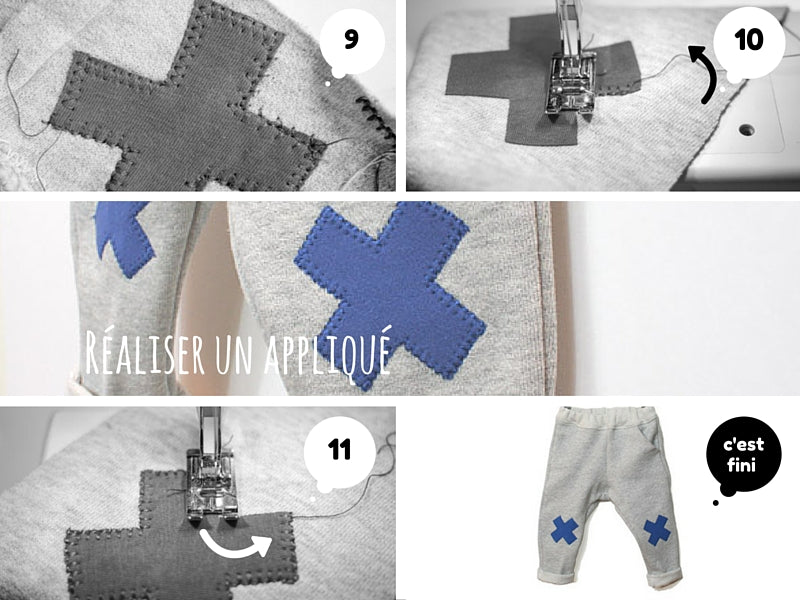
- Choose a stitch (tight zigzag or cover stitch). I recommend testing on an extra patch to adjust the stitch and technique.
- Once the tests are done, start stitching right at the edge of the patch to reinforce its hold and finish the borders.
- You need to lift the presser foot at each corner to reposition the patch and continue carefully. Tip: go very slowly and undo if necessary.
Any flaw will definitely be visible because patches are usually contrasting and very noticeable (that's the point of a decorative element). So don’t hesitate to redo the work.


Un patron gratuit pour toi 🎁
Inscris-toi à la newsletter et reçois un patron de couture gratuit en cadeau de bienvenue !